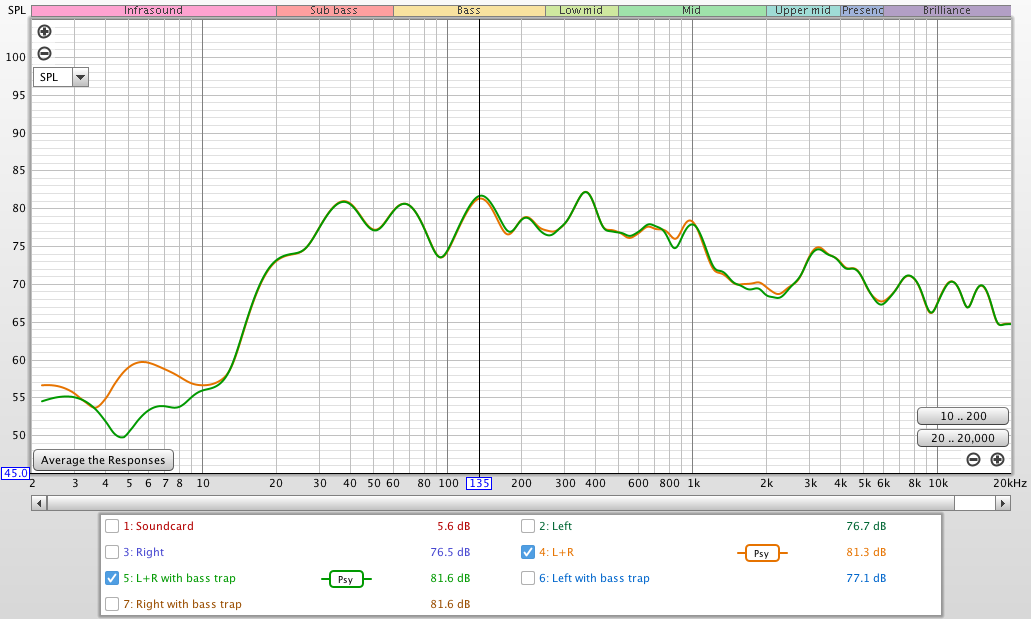
Getting rid of that big bump! SPL graph before and after.
Many years ago, an audio dealer visited my home when I was auditioning a piece of gear. After we plugged in the candidate component and started listening to music, he said, "Wow, you really need bass control". I was slightly put off by his comment and thought it was not good salesmanship to criticize a potential customer's listening room. I was familiar with the benefits of room treatments because I already had mid-frequency absorbing panels on the walls. I'm not a "bass freak" (I'm more of a soundstage guy), and I was content with the treatments I had. I felt no need for ridiculous looking tube traps which were in vogue at the time.
Fast forward to the present day when my current listening room is an acoustical horror show with hardwood floors, a high vaulted ceiling, and a wall of glass. I realized that I needed room treatments to improve my system. WAF limitations prevent me from adequately treating the walls of the living space with the necessary surface area of acoustic panels. I do have an allowance of a single large panel of Owens Corning 703 behind the listening position (see below) and a thick area rug.
One untapped opportunity in the room was an unused corner with no furniture. I decided to put a bass trap in the corner to see if it would improve things. I considered the "superchunk" style of bass trap, and although it would have been easier to make, I chose a tube trap design for aesthetics.
I researched bass traps at Jesco Lohan's Acoustics Insider channel. He has an excellent PDF guide which I recommend. Even though his channel is geared toward treating studios, I feel the concepts for studios also apply to listening rooms:
Jesco says tube traps are not really bass traps but "a broadband absorber that also absorbs some bass if you make them deep enough" – which is exactly what I wanted.
The original patent for bass tube traps is from 1985 by Art Noxon of Acoustic Sciences Corporation. Most DIY designs wrap loose fiberglass around a wire mesh skeleton with internal baffles for structural support. I wanted to avoid these designs and simply glue prefabricated cylinders together to make it look better and avoid inhaling loose fiberglass insulation.
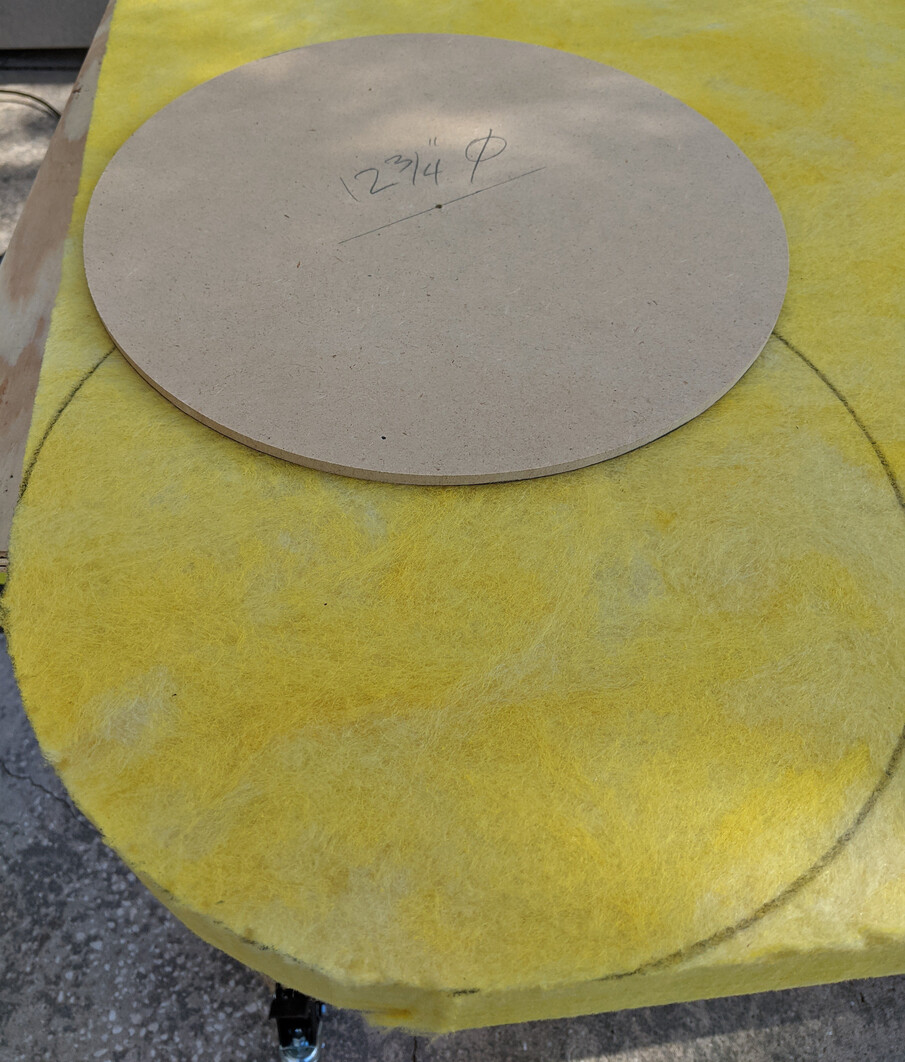
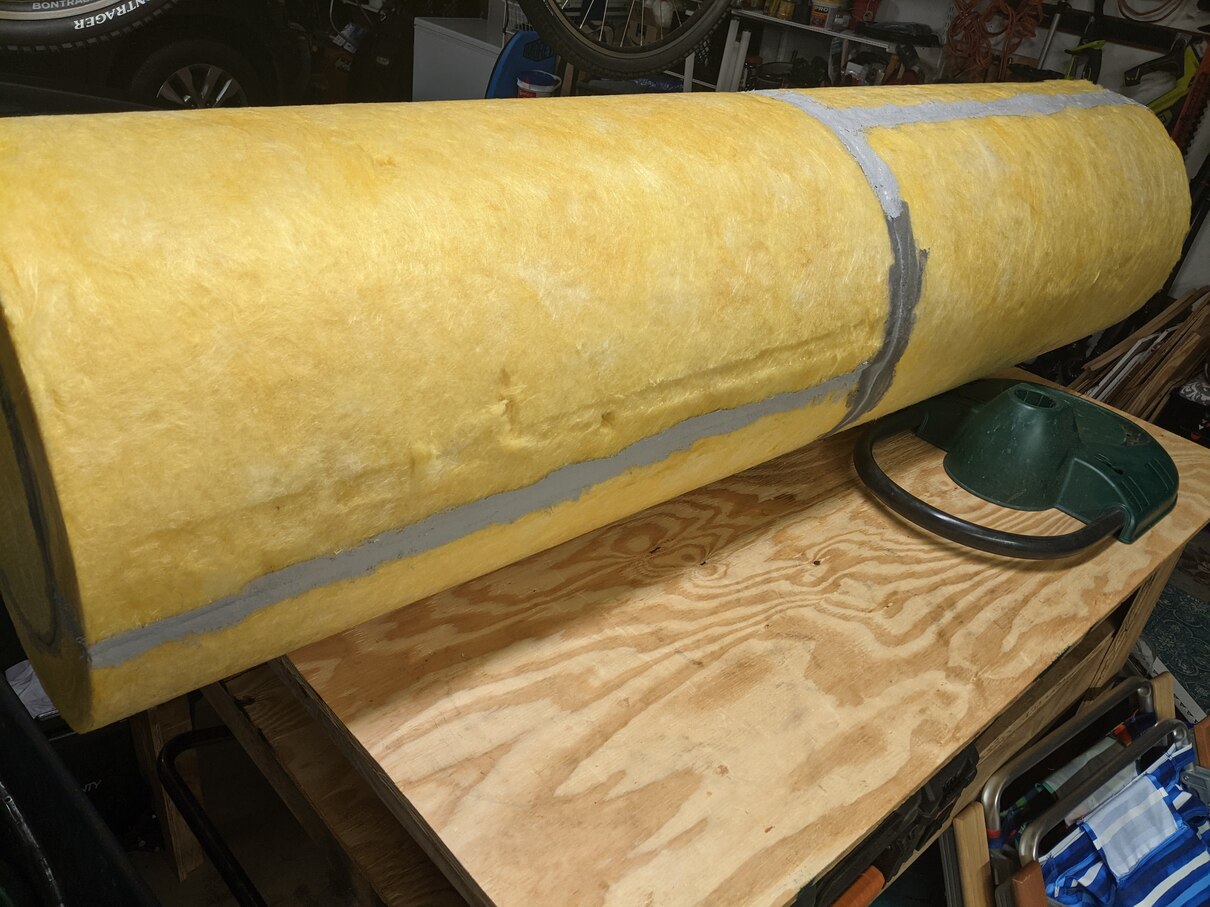
I decided to maximize absorption by making the tube trap as big and thick as possible. I had a relatively large footprint to work with, and I chose 3" thick pipe insulation for a size 12 pipe. Insulation for a nominal 12" pipe means the insulation's inner diameter is actually 12.75", and adding 3" thickness all around means the outer diameter of the tube trap is 18.75" (3 + 12.75 + 3). Two 36" sections stacked on top of each other gives an overall height of 6 feet (even more if you count the endcaps). The Johns Manville website data sheet says the fiberglass density is "at or above" 3.5 pounds per cubic foot, which is relatively close to the 3.0 pcf density of OC703.
The first step was to glue the seams together with construction adhesive. The insulation came with peel and stick tape that is meant to stick to the wrapping foil and not the fiberglass, so I didn't use it.

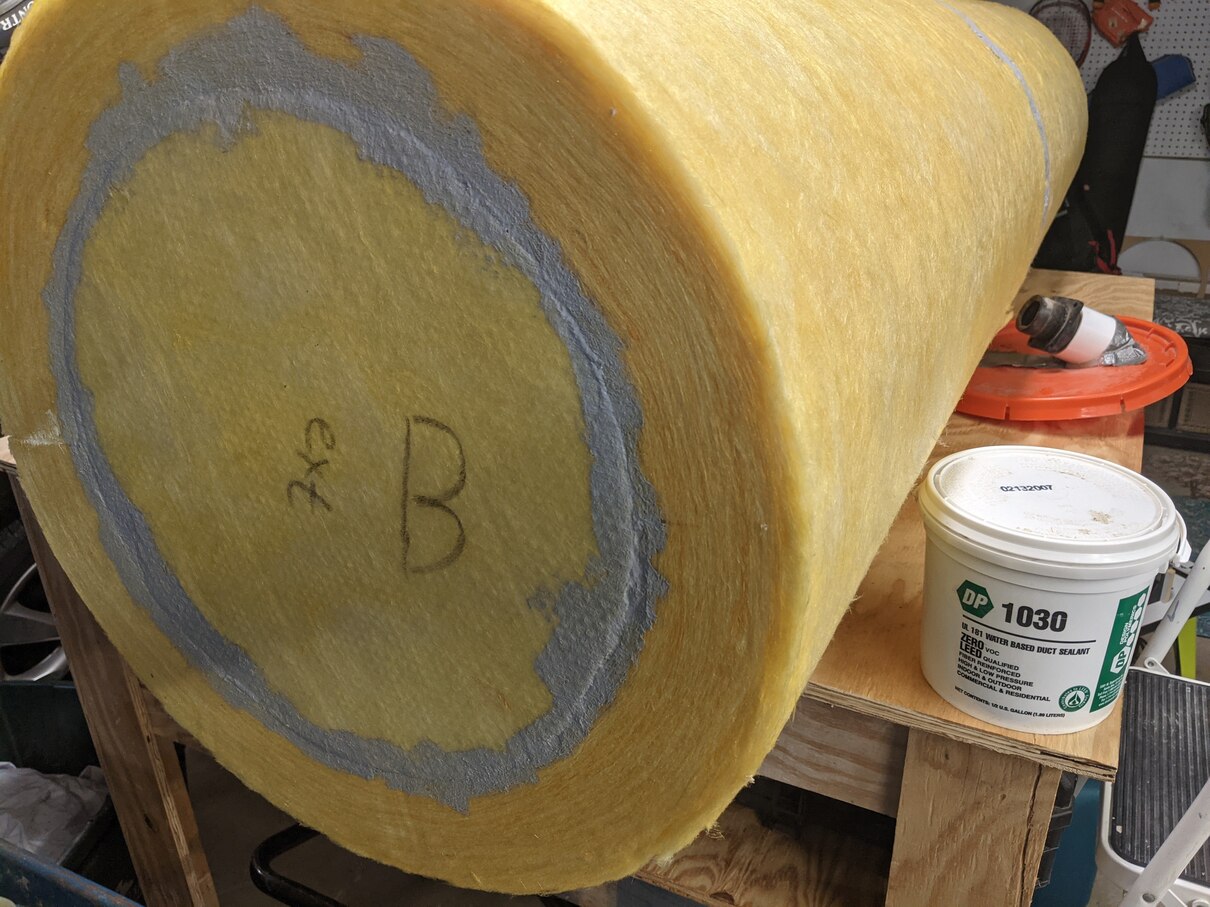
The Noxon patent describes a 120° “reflective zone” on the trap that you can turn outward for diffusion while the rest of the trap acts as a mid- and high-frequency absorber. The patent lists a formula for calculating the perforated area necessary to achieve a low pass filter. Some DIYers use the manufacturers' foil wrap to create a reflective zone even though Art Noxon says it doesn't sound right. I decided that since my room lacked adequate absorption, I would not focus on diffusion but instead maximize absorption, so I discarded the foil wrap that surrounded the insulation. The wrap was attached with only a few areas of adhesive, and peeling it off did not damage the overall surface of the fiberglass.


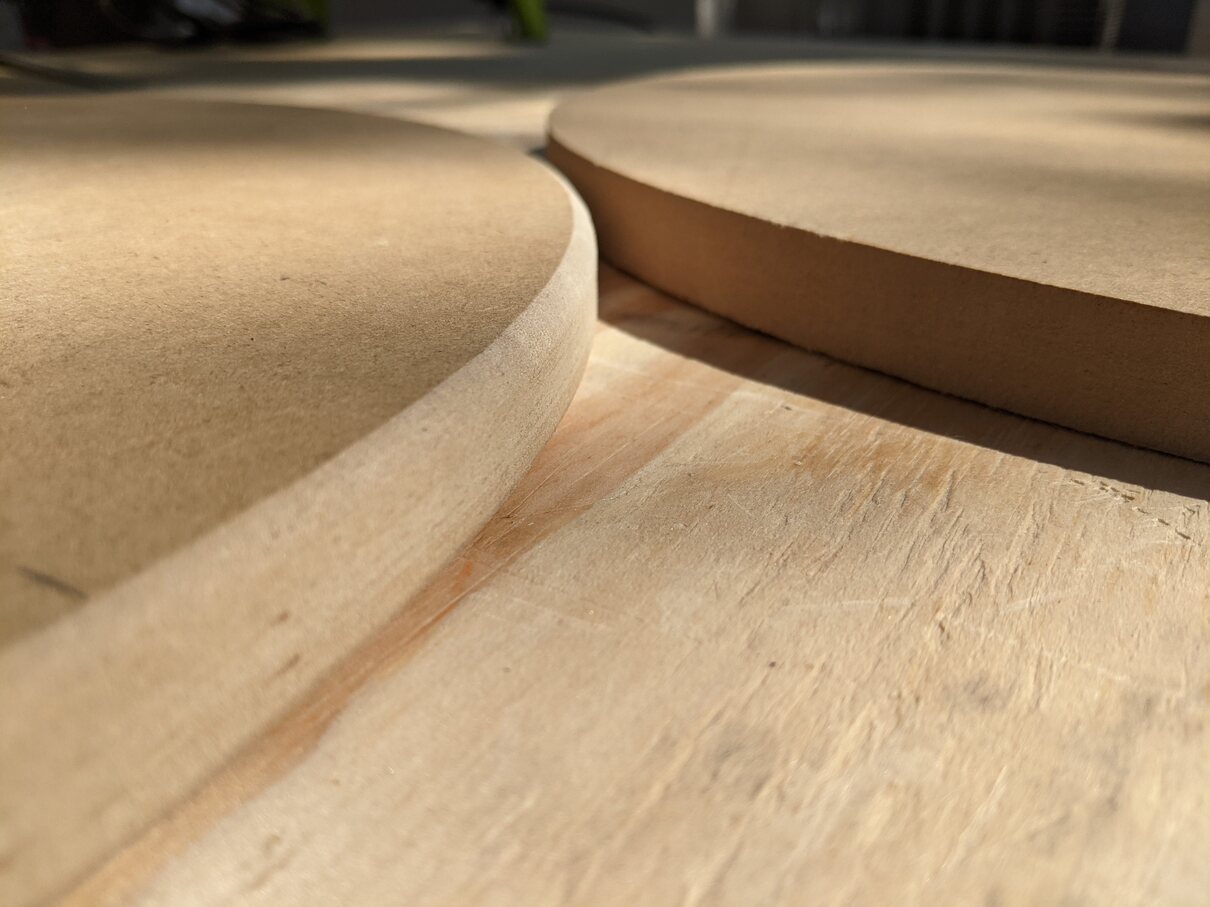
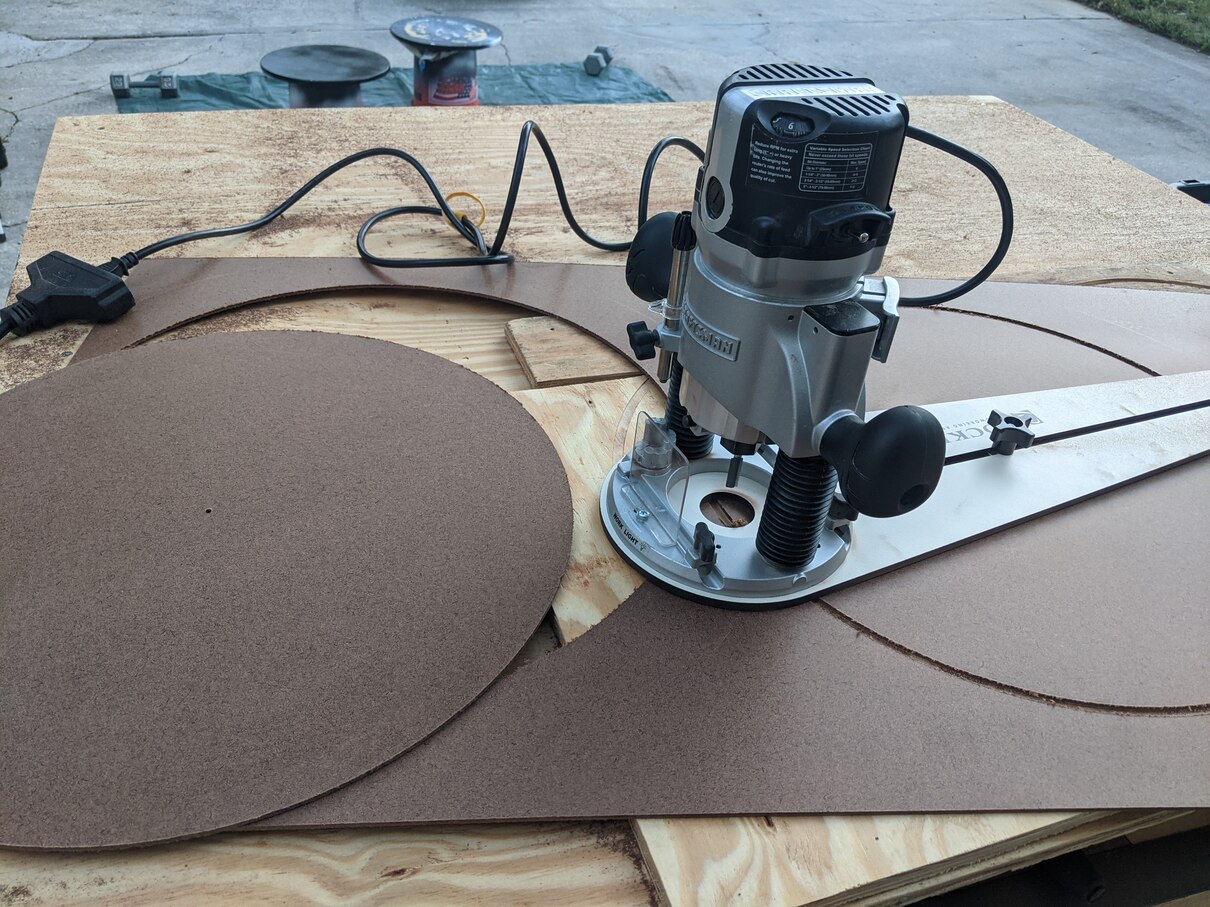
I used some scrap 1" MDF for the top and bottom endcaps. The relatively thick dimension is in scale with a 6 foot tall tube trap. I used a router table and a ¼" roundover bit on the edges. Did you know that cut MDF edges need to be covered with drywall compound or else paint won't stick to them? I didn't. But I found out quickly because the primer and paint disappeared into the edges until I sealed them with drywall compound.

Version 1.0 had several aesthetic problems:

I needed to improve the design. I removed the endcaps, peeled off the acoustic fabric, and made some changes:
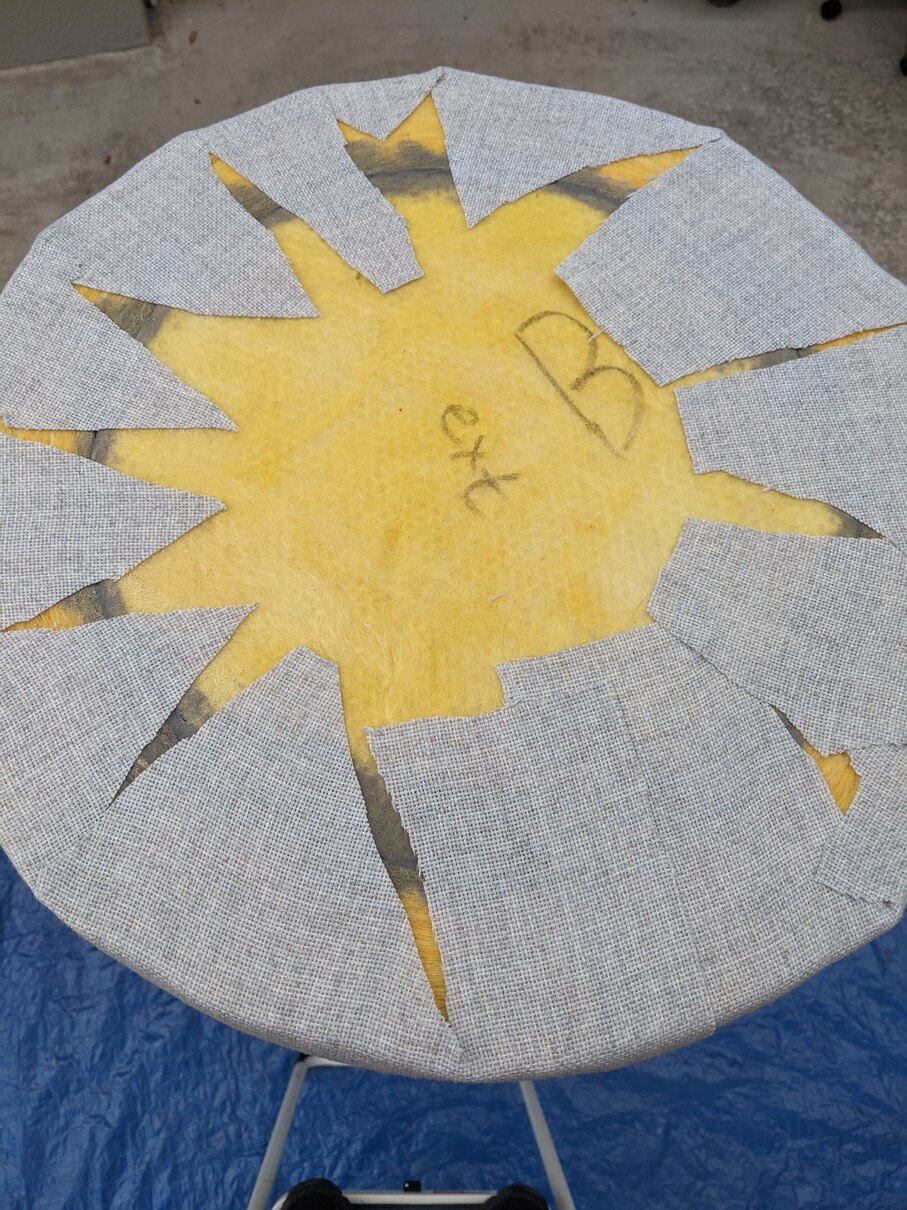
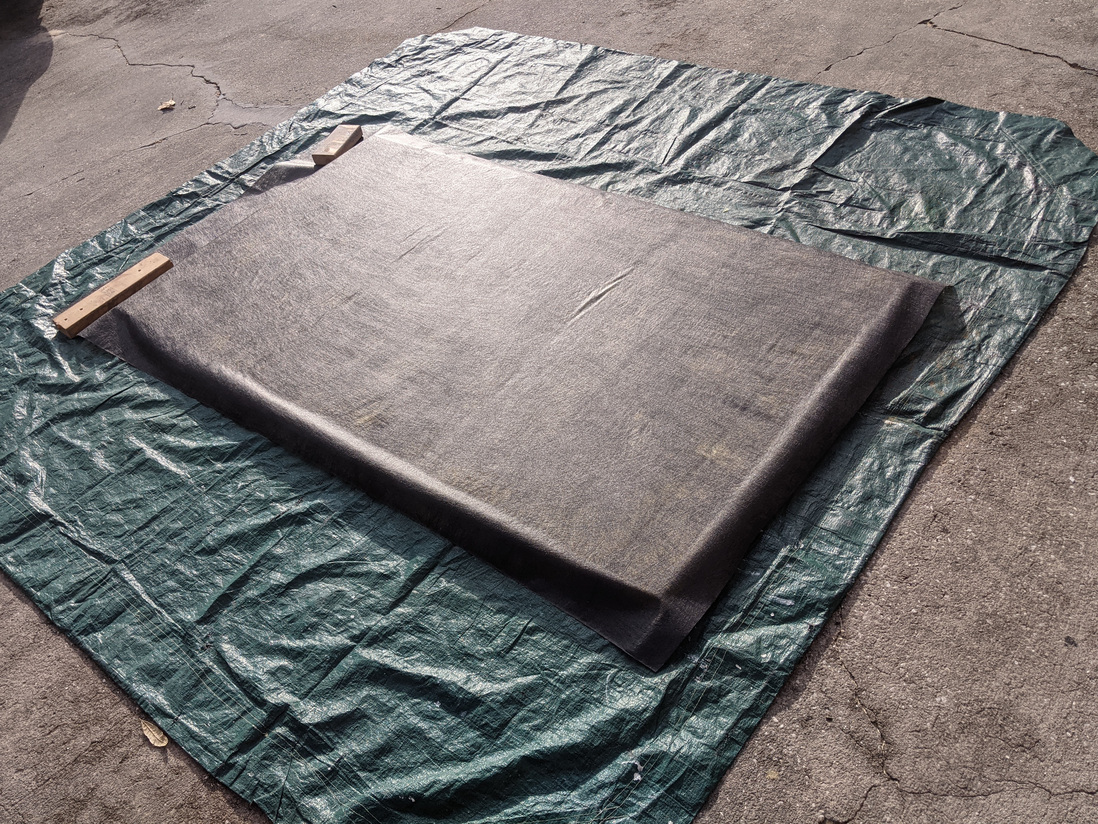
Rolling the tube over the fabric on the ground was the only way to get things to adhere without rippling. Attempting vertical or horizontal panels looked terrible. The rippling on the landscape fabric you see in the picture above was later hidden by the acoustic fabric.

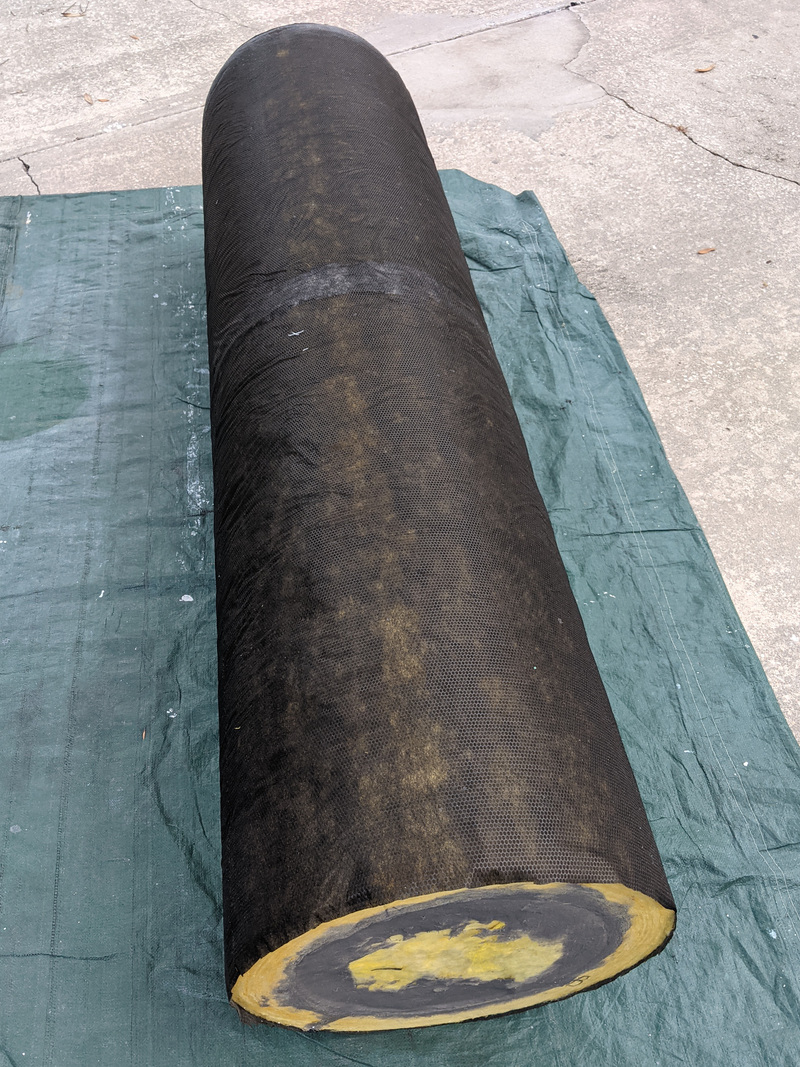
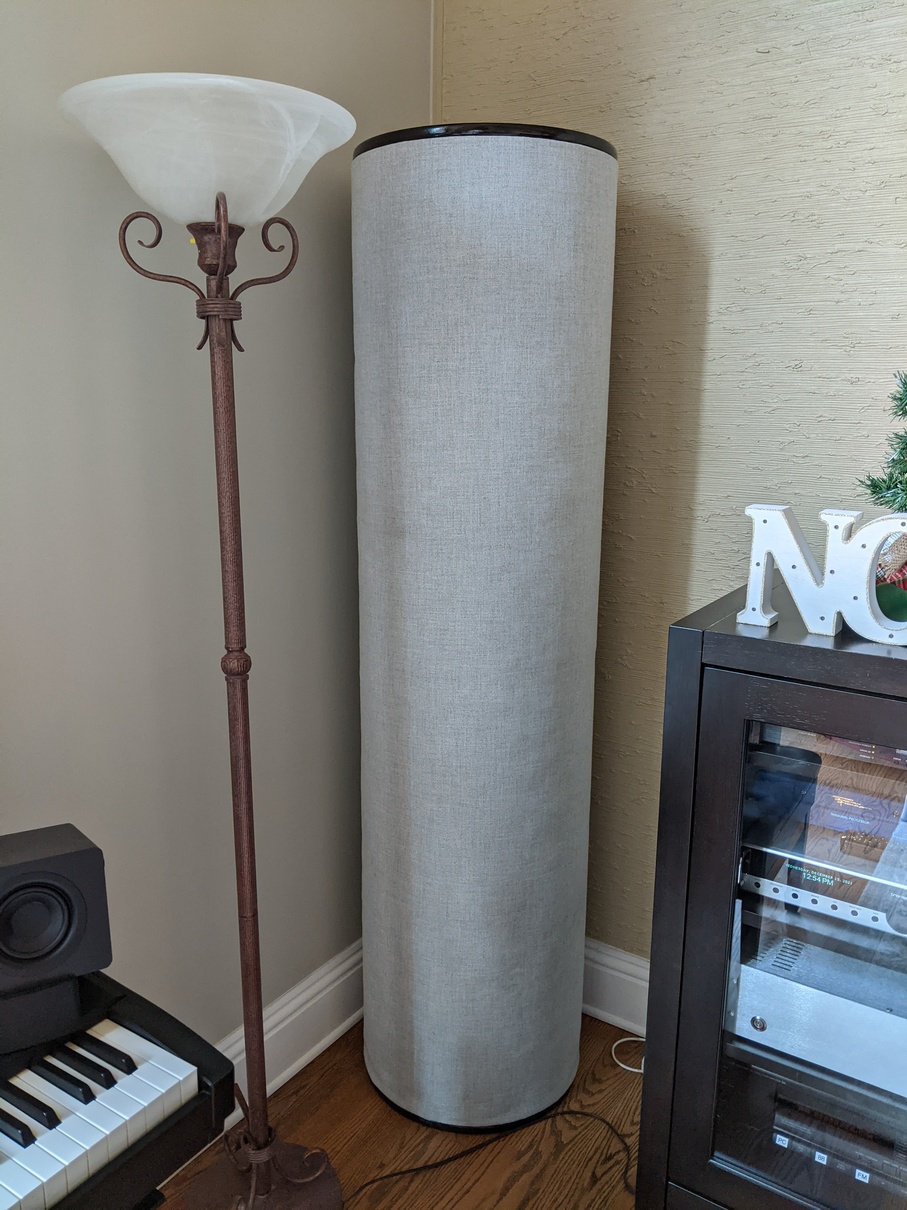
The Final version looked much better!
I decided to give Room EQ Wizard a try for the very first time. I purposely did the measurement before a critical listening test. Jesco Lohan says it takes years of experience to interpret these graphs, but here's my first take. Sound pressure level with psychoacoustic smoothing:
Initially, I saw no SPL difference in the auditory frequencies because REW's default graph range is 20 Hz to 20 kHz. Once I lowered the range below 20 Hz, I saw a measured difference in the infrasound band. Note my speakers' advertised lower frequency response is 20 Hz, and that is accurately seen in the roll off here.
Spectrograms, before and after:
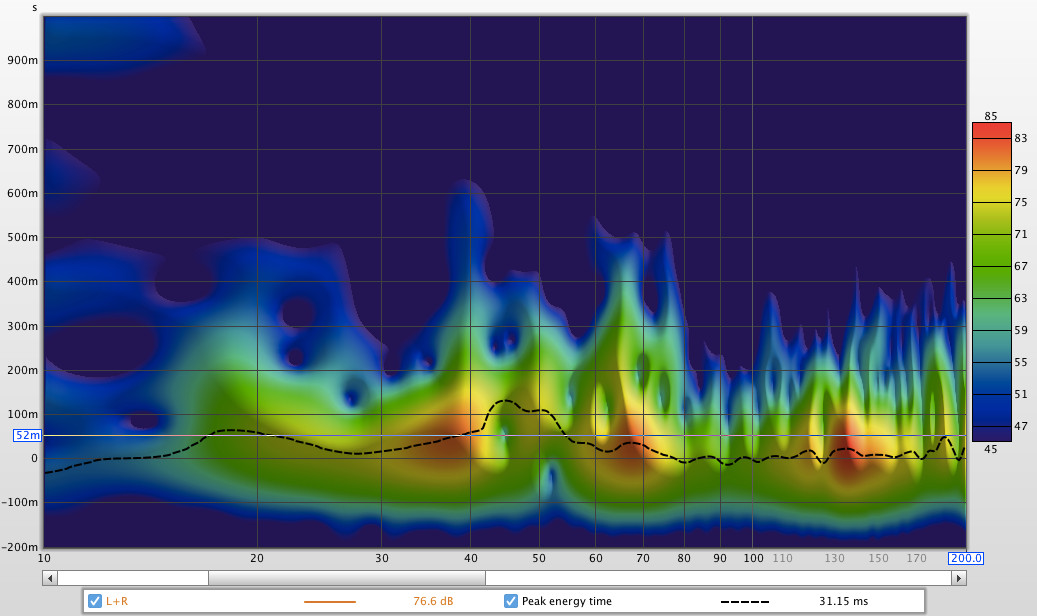
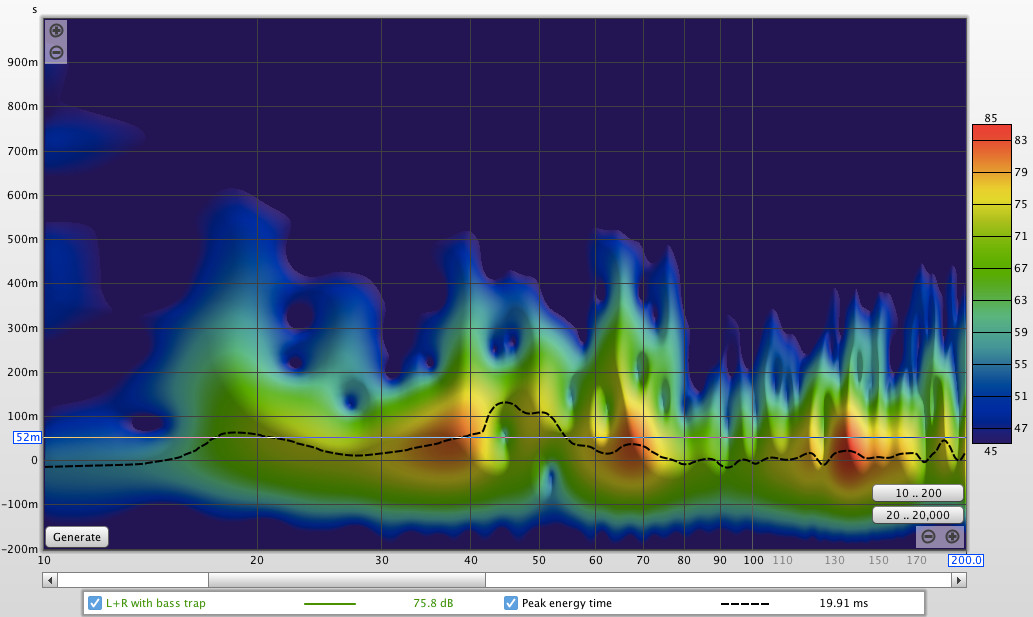
My layman observations:
Then I did a musical test. Two tracks I use for bass response are Primitive by Annie Lennox (Diva) and Kiss That Frog by Peter Gabriel (Us). I could tell an obvious difference in how the bass sounded with and without the trap. Without the trap, the lower bass sounded buzzy and unfocused, and it seemed like it had a long reverb time. With the trap installed in the corner, the bass tightened up and no longer sounded buzzy. I didn't hear much difference in the mid-frequencies, but I didn't expect to; the trap was not placed at a prominent reflection point, and any broadband absorptive benefits were a nice-to-have, not a requirement. I did notice when I leaned over and put my head between the tube trap and the corner walls while music was playing, my head felt like it was inside a bass drum!
Conclusion. Do tube traps work? I say, yes. There is a measured difference in both the audible and infrasonic range, and I can attest there is a significant perceptive difference in the bass response. Despite not being a "bass freak", I now appreciate the impact bass treatments make, and I am satisfied that removing a distraction provides an overall improvement in the sound.
Cost. Excluding the supplies I had on hand, here is a cost breakdown:
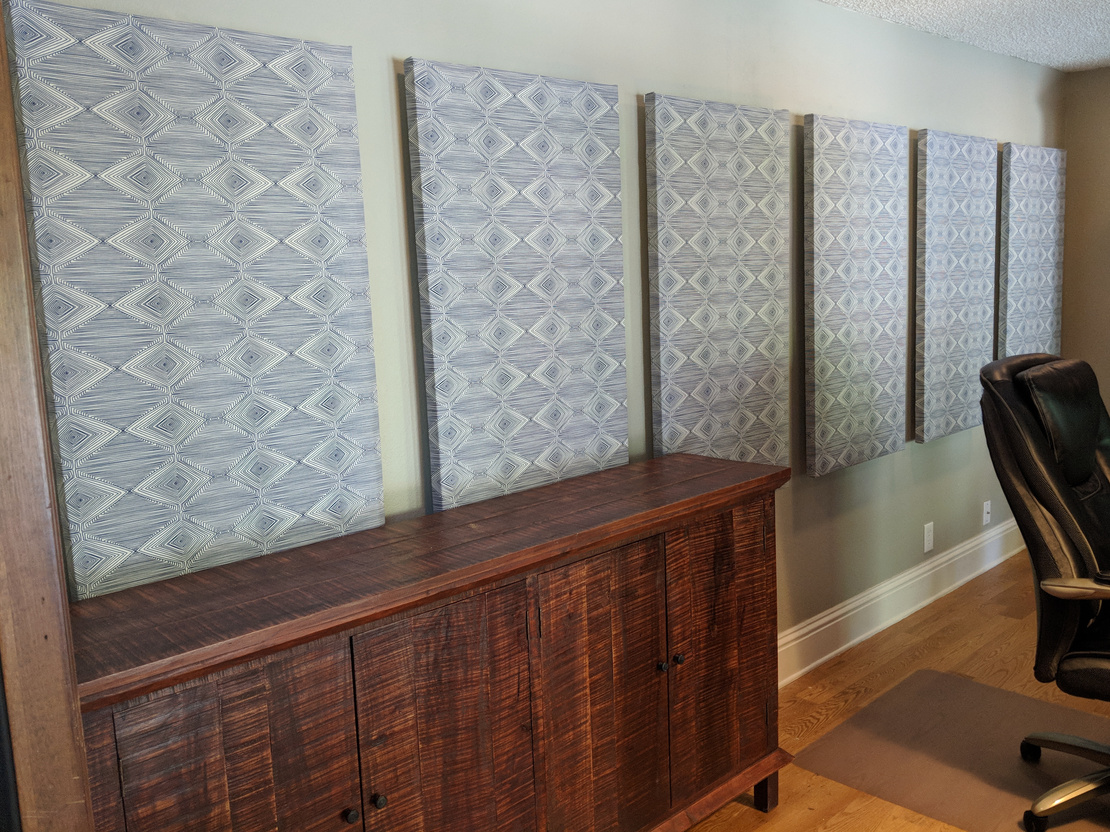
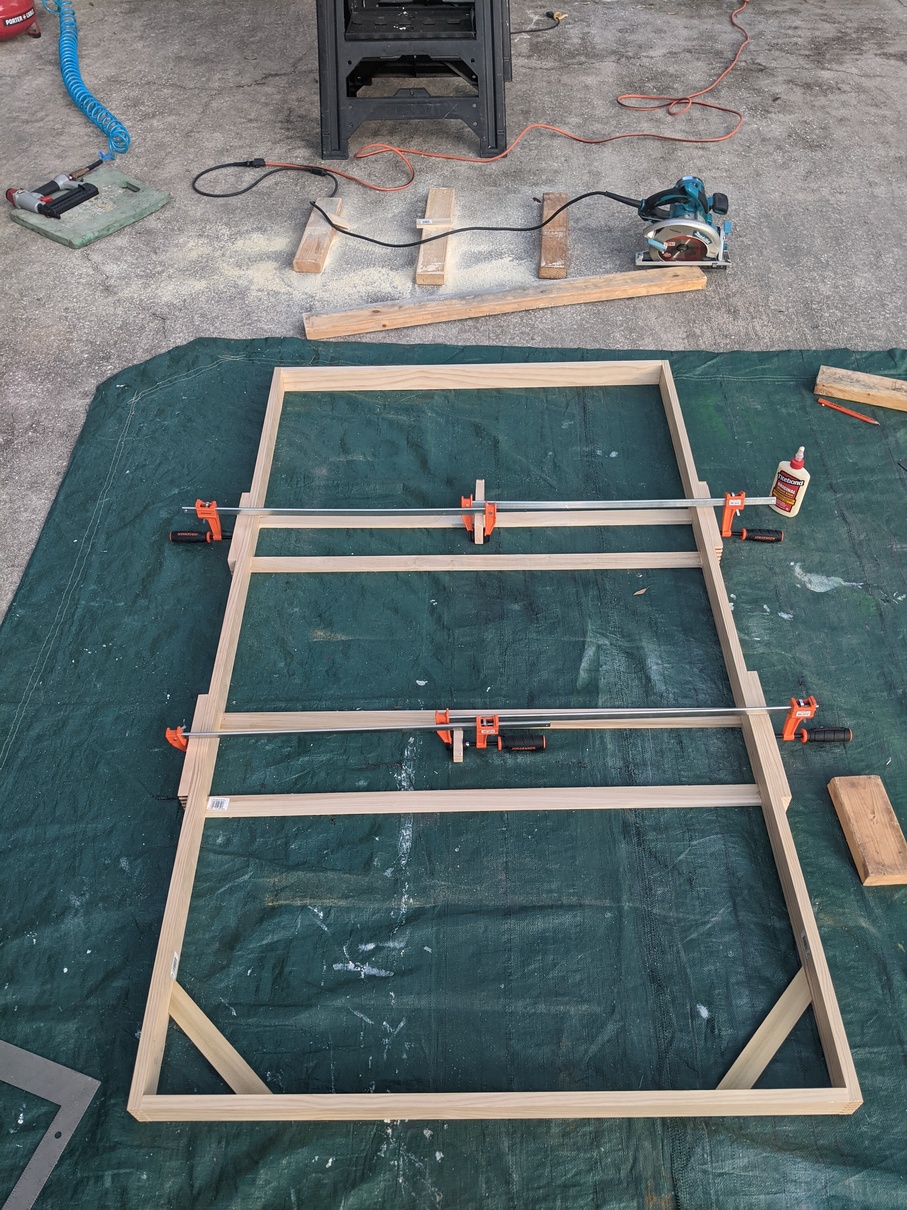
I made a large broadband absorbing panel and mounted it directly behind the listening position. It consists of several Owens Corning 703 panels totaling 20 square feet covered in some artsy fabric.
The frame is made from 1x3 select pine (no knots) whose 2½" depth equals the 2" thickness of OC703 plus the ½" thickness of the poplar backing slats. The corner box joints were made using a router table and a box joint jig from Rockler. The box joints are extremely strong – even when flexed – which helped immensely when I went to mount the frame on the wall. It turned out the wall was not plumb or square, and I had to bend and rack the frame to get it aligned. If I had used miter joints instead of box joints, the frame corners would have split.
The backs of the OC703 panels were sprayed with adhesive and covered with stiff landscape fabric to contain the fiberglass fibers as well as join the panels together.
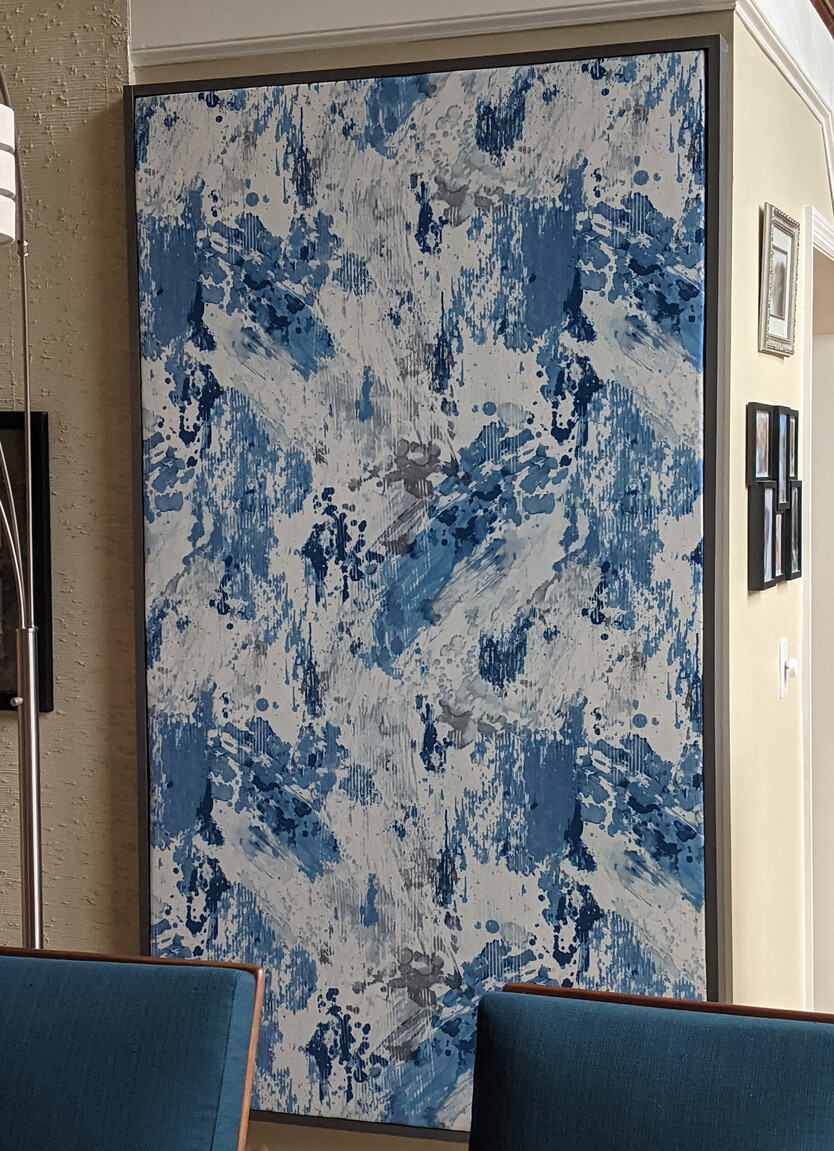
I tried to stain the frame to show off the nice grain and box joints, but I discovered that porous wood like pine ends up looking horribly splotchy with oil-based stain. You are supposed to use gel-based stain on pine. Finishes have never been my strong suit! Having learned my lesson, I ended up spray painting the frame with metallic speckled paint of acceptable WAF.
The frame was screwed to the wall, then impaling clips were attached to the frame slats, and finally the large conjoined panel was pushed into the frame and held in place by the clips. The fabric is not acoustical, but aesthetics were more important in this situation.
The final product looks good and helps reduce flutter echo in the room.
These were the first acoustic panels I ever made. I needed to fix a serious flutter echo problem in my office. It was so bad that people on calls told me, "You sound like you're talking inside a bucket."
The general design came from this YouTube video. The frames are made from select pine, and the corners are simple miter joints. The OC703 panels are held in the frame with spray adhesive and brad nails from a nail gun. The panels sit proud of the frame which gives them a subtle beveled look once everything is covered with fabric.

L brackets are used to mount the panels 1" off the wall to increase their sound absorption. See part two of the previously mentioned YouTube video.